DIY - Minn Kota bearing maintenance

Post Reply
User avatar
MikeD
Posts: 1089
Joined: Mon Nov 14, 2005 11:30 am
Location: Sonora, CA

DIY - Minn Kota bearing maintenance

Post by MikeD »

noticed that the bottom bearing on the trolling motor was showing some rust on the shaft so I decided to take a few minutes and grease it up to help keep the bearing working really smoothly. figured I'd shoot some photos so that others can do this simple procedure. all minnkota's use the same setup so this applies to all sizes.

difficulty on a 1 - 5 scale with 1 being uber easy and 5 being rocket science:

1

time required:

about 5 minutes

tools:

rag or paper towels
3/16 allen wrench
small cotter pin, or jewelers screwdriver, or something small and thin (no jokes about gators junk please...)
grease - marine grade bearing grease would be best but anything will do, it's most important that there is some sort of grease in there vs the bearing being dry

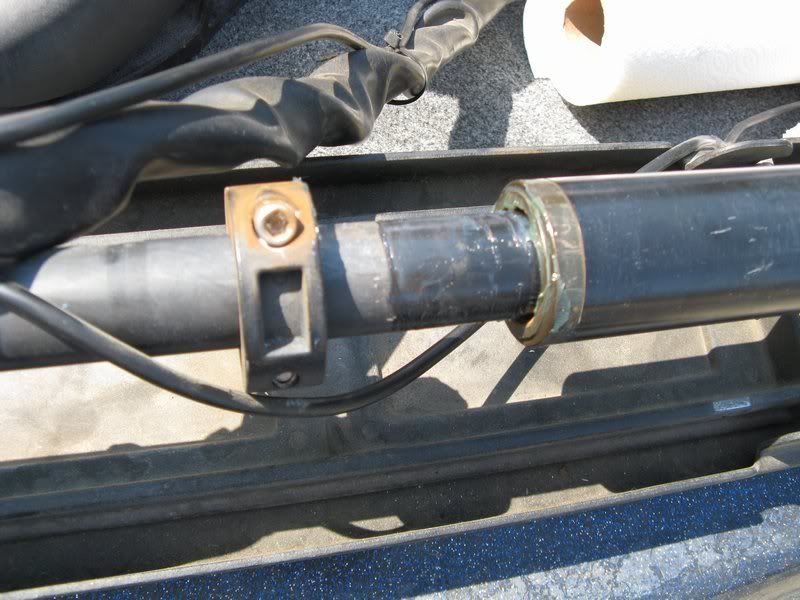
STEP 1: loosen the collar

Image


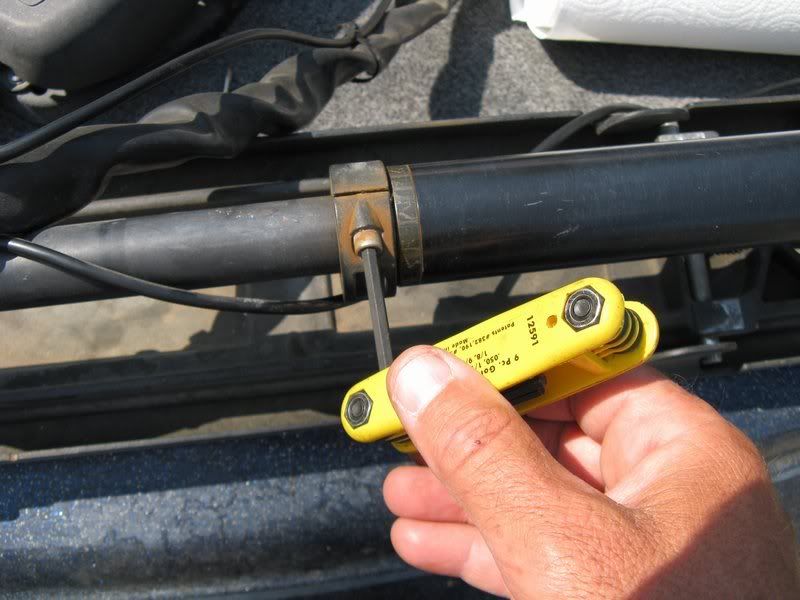
using the 3/16 allen wrench loosen (but do not remove) the 2 allen head bolts enough so that the collar will easily slide down. you can tell that my bearing is dry by all the brown/orange rust in the area.

STEP 2: pull back the dust cap

Image

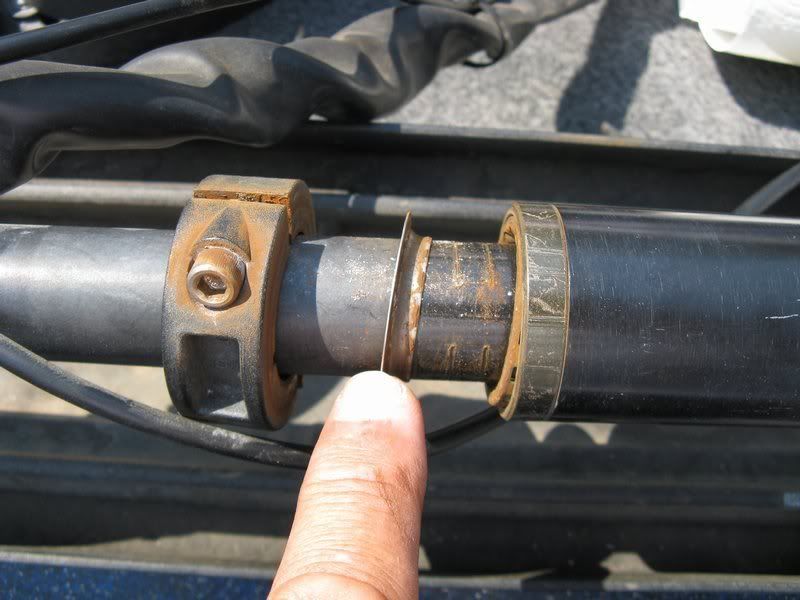
I opened up a small cotter pin here to get inside the collar and carefully pull the dust cap back to expose the bearing. you can lift/move the shaft on the motor to relieve the side-to-side pressure on the dust cap.

STEP 3: pull back the bearing

Image

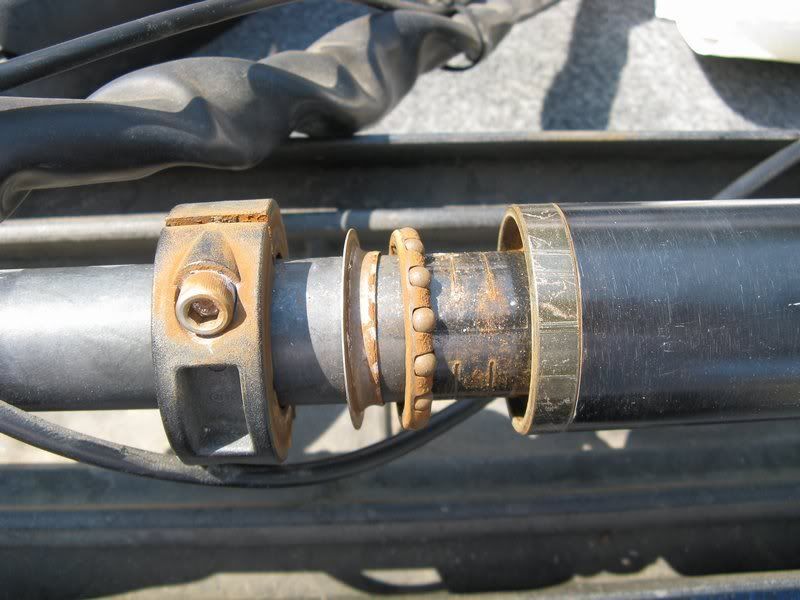
I should have put the rag under the shaft to help catch anything that may have fallen out. but its the same thing here, used the cotter pin as well and rocked the shaft gently to get the bearing out.

note: use some caution here, if the bearing cage is trashed then you'll end up with all the BB's in the cage rolling out and hopefully onto your front deck. you can put the BB's back into the cage if you have been careful and used the rag to catch them.

if you need a new bearing cage they are ~$1.60 each directly from Minn Kota at 800-227-6433 and order part number 2266000. Local sources may be available as well, rumor is that The Hook carries stock

my dust cap and bearing are as dry as the desert, no wonder I had rust marks. but luckily the BB's stayed in the bearing cage.

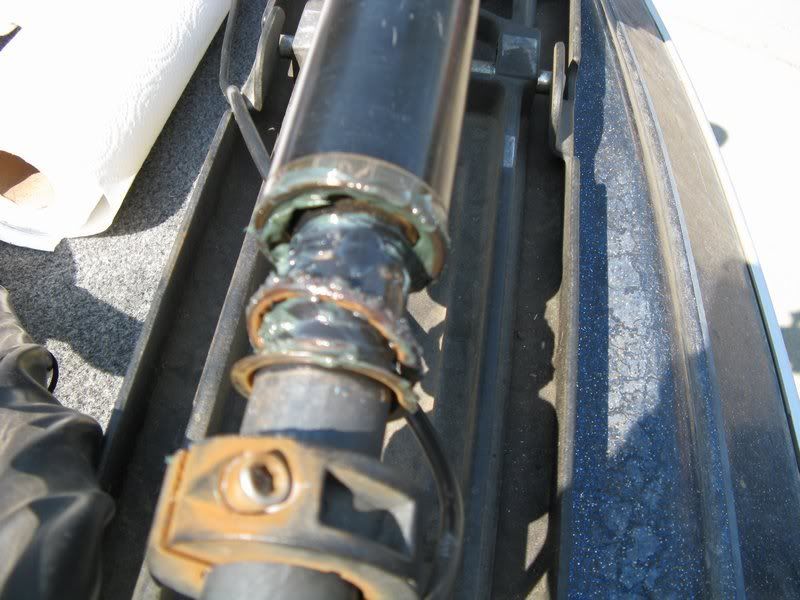
STEP 4: grease 'er up

Image

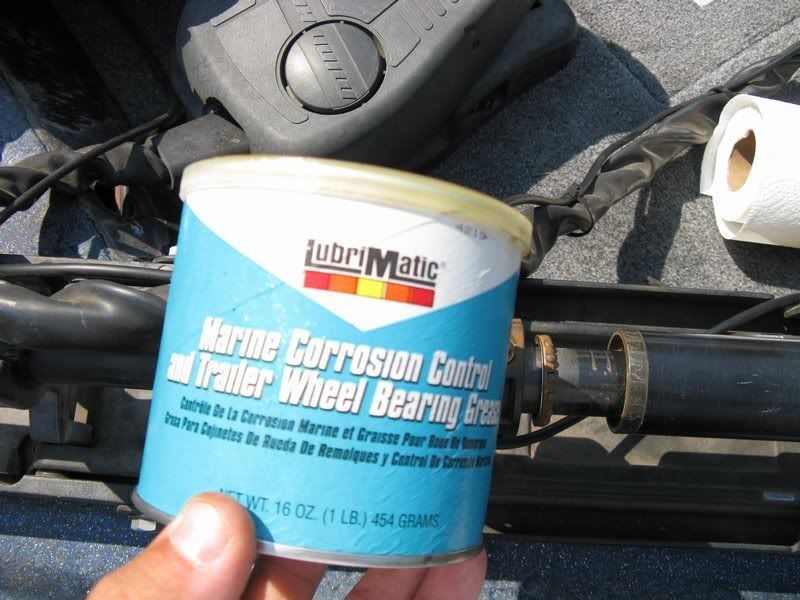
I used a can of this bearing grease, took a dab of grease onto my finger and scraped it off on the bearing cup to get something up into the race. then applied it to the bearing cage and the dust cap

Image

STEP 5: reassemble

Image

rock the shaft gently while pushing the bearing cage with all the BB's installed back into the bearing cup/race, then repeat for the dust cap

slide the collar back in so that its snug onto the bottom of the dust cap -- you can't get it too tight, but you can leave it too loose so make sure it's up and snug (BABY!)

STEP 5: test

if possible drop the trolling motor while the boat is on the trailer then give it a go and make sure the shaft is moving smoothly and not bound up. go fish
Last edited by MikeD on Sun Apr 25, 2010 11:15 am, edited 1 time in total.
"I'll just drop it on their head, and then rip their lips off with a TV hookset..." <i>unnamed angler when discussing how he fishes a jig</i>
User avatar
DeltaDan
Posts: 2880
Joined: Fri Dec 08, 2006 7:56 pm
Location: Oakley, CA
Contact:

Re: DIY - Minn Kota bearing maintenance

Post by DeltaDan »

Very VERY NICE BrothA Mike !! ImageImage


Mine is fine for now .... Thinking I need to upgrade to a #101/#109 or at the Minimum a MG #82 Digital as my batteries are not lasting the full day. -- And Tourney time is around the corner !!


Now I just gotta sell a boat and split whats left of it with the wife to be able to make that move. :idea:
You know, we always called each other goodfellas. Like, you'd say to somebody: "You're gonna like this guy; he's all right. He's a goodfella. He's one of us." You understand? We were goodfellas, wiseguys.

[b]Team LL [/b] (2006 ~ And Beyond !! )
User avatar
MikeD
Posts: 1089
Joined: Mon Nov 14, 2005 11:30 am
Location: Sonora, CA

Re: DIY - Minn Kota bearing maintenance

Post by MikeD »

what size ya got now? That's a 12v 55 that I'm prob going to want to upgrade to larger 24v setup at some point
"I'll just drop it on their head, and then rip their lips off with a TV hookset..." <i>unnamed angler when discussing how he fishes a jig</i>
User avatar
DeltaDan
Posts: 2880
Joined: Fri Dec 08, 2006 7:56 pm
Location: Oakley, CA
Contact:

Re: DIY - Minn Kota bearing maintenance

Post by DeltaDan »

#74 currently.


I priced swithing over to the MG Digital from Gene at the hook last week. Will need another battery tray and battery ... and possibly another fuse as well.


Gona keep the same 3 bank charger and just to a manual chage on the Cranking battery.


.... Course -- This is all with "Wifes permission first" If/after I can unload the Cobalt. :wink: :lol: :lol:
You know, we always called each other goodfellas. Like, you'd say to somebody: "You're gonna like this guy; he's all right. He's a goodfella. He's one of us." You understand? We were goodfellas, wiseguys.

[b]Team LL [/b] (2006 ~ And Beyond !! )
User avatar
MikeD
Posts: 1089
Joined: Mon Nov 14, 2005 11:30 am
Location: Sonora, CA

Re: DIY - Minn Kota bearing maintenance

Post by MikeD »

bump - fixed the borken photo links, now all is well again. This only takes a few minutes to do and makes your trolling motor much happier.
"I'll just drop it on their head, and then rip their lips off with a TV hookset..." <i>unnamed angler when discussing how he fishes a jig</i>
User avatar
minnkotaman
Posts: 163
Joined: Wed Apr 18, 2007 12:04 pm
Location: SAN RAMON

Re: DIY - Minn Kota bearing maintenance

Post by minnkotaman »

the only thing i have to disagree with is the grease you used.
in two years when all the high end eithers disapate form
the grease it will be worse than it is now.
use vaseline in 10 years it will be the same as the day
you put it on. but you don't have to believe me
I've only been working on these motors for 28 years now.
Jim l.
User avatar
MikeD
Posts: 1089
Joined: Mon Nov 14, 2005 11:30 am
Location: Sonora, CA

Re: DIY - Minn Kota bearing maintenance

Post by MikeD »

point taken, thanks for chiming in with good info
"I'll just drop it on their head, and then rip their lips off with a TV hookset..." <i>unnamed angler when discussing how he fishes a jig</i>
User avatar
Brian D.
Posts: 4032
Joined: Sun May 08, 2005 8:12 am
Location: Deep South
Contact:

Re: DIY - Minn Kota bearing maintenance

Post by Brian D. »

Good stuff Mike. You're gonna put 'ol "blue font" Marty out of business writing up good how-to's. Have you greased up the bearings in the (head) top part of the unit? They need some lube-love as well. 8)
~~ I'm trying to think but nothing happens ~~
http://www.youtube.com/watch?v=i8MhaihAw7I&feature=related
User avatar
MikeD
Posts: 1089
Joined: Mon Nov 14, 2005 11:30 am
Location: Sonora, CA

Re: DIY - Minn Kota bearing maintenance

Post by MikeD »

Brian D. wrote:Good stuff Mike. You're gonna put 'ol "blue font" Marty out of business writing up good how-to's.
that old blue tongued devil does a much better job than I do, he's retaining the title of being the Martha Stewart of WB...

That said, I did do a quick DIY on how to make a marker buoy out of pool noodles, pvc, 1oz sinkers, and bullet weights - but I wasn't able to find it yesterday to make sure the photos were still intact.
Have you greased up the bearings in the (head) top part of the unit? They need some lube-love as well. 8)
yes, I should prob update the info to show how to slide the head up and get to those top bearings. The issue with the bottom ones is that they normally sit about level with the water and tend to see a lot of moisture. The top bearing is pretty well protected by the plastic. I also replaced the shaft (lower bearing dropped a fell balls from the cage that tore the shaft up), amazingly easy once you see it done.
"I'll just drop it on their head, and then rip their lips off with a TV hookset..." <i>unnamed angler when discussing how he fishes a jig</i>
Post Reply