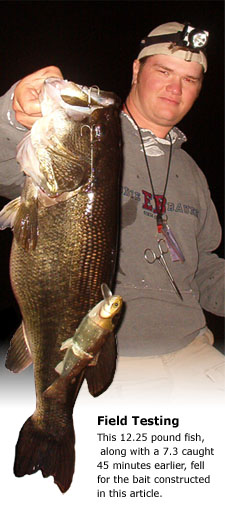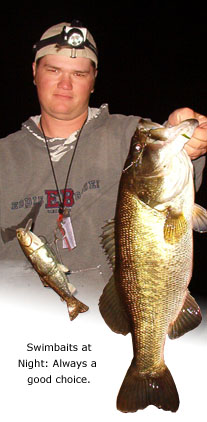
 Ever since big swimbaits started hitting the market in the early 90's the Castaic Trout has always been, and still is, one of the most realistic looking and swimming trout imitations out there. It gets bit by huge bass because it has a superb trout silhouette, one of the most realistic finishes (not as detailed as some, but more realistic), and a great swimming action. It also can be very durable. Despite a few flaws, which I'll go over fixing later, this is a bait that can catch fish after fish without getting out of tune, torn or otherwise destroyed... a big bonus for people wondering if they should invest the $30 in purchasing a big soft plastic bait.
There's always a catch, though. The one big (huge!) problem has been the hooking and landing ratio with this bait. It is terrible, worse than just about any other swimbait. To begin with, the bass has to really engulf the big 9 inch bait to get stuck on the one treble hook positioned right behind the bill. Once the bass is hooked it starts shaking the big heavy bait back and forth violently and sooner or later the weight of the bait will tear the hook right out of the fishes mouth. For these two reasons many serious big bass fisherman have let the bait sit in their box for years even though it gets bit so well.
A few years ago reading on the internet I learned about pro-rigging soft plastic swimbaits. The guys at Bass World West had come up with this method to prevent the Osprey Talon from tearing apart. The basic concept is to insert a small tube from where the line usually is to the bottom of the bait where the hook attaches. To fish the bait you thread your line through the tube and tie it off to a treble hook. This way when the fish gets hooked the bait slides up the line. Just hooked onto a bare treble, the fish can't use the swimbait as leverage and can't tear it to bits shaking it back and forth.
After learning about pro-rigging the Osprey I've been experimenting with pro-rigging the Castaic baits for some time. It works out quite well with both the Gizzard Shad and the original Castaic Trout. I recently pro-rigged another of the old Castaic Trouts and documented the process with photos for this article. If you've got some of these baits lying around that you're scared to fish with, give this method a try. The hookup ratio goes from poor to great, and the landing ratio goes from terrible to superb.
Materials Needed
- 9 inch Castaic Trout (pre-snap-on model)
- Mini Aquarium Tubing, 5/32 inch outside diameter
- Assorted nail weights
- Pros Soft Bait Glue or Gel Super Glue
- Masking or Scotch Tape
- Electric Drill with 5/32 inch bit
- Vice grip pliers
- Razor blade or exacto knife
- 40 lb mono
- 2 2/0 Gamakatsu round-bend trebles for rigging
These instructions are only for the older, pre-snap-on model Castaic Trouts. I will show instructions for the snap-on type baits next month.
The Bait
This is a very old Castaic trout that has some cracking in the head from too much exposure. It hasn't been swimming quite right ever since, so I will try to kill two birds with one stone by pro-rigging it and correcting its tilt with internal nail weights.


Fixing the Problems
The bait has two durability issues. First the body is not as securely attached to the head as it needs to be. After a half dozen days and a couple fish the body starts to tear away, and once it starts going it can easily fall off. In this article I will show how to permanently reinforce this connection with plastic tubing. The bill is also poorly glued into place and will be re-glued with something stronger.
The rest of the article will deal with pulling out the wire hook harness and replacing it with a pro-rigging setup.
Option A -- Cheating
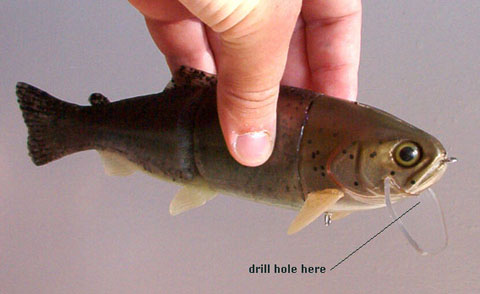
You can just bend the two eyelets and drill a small hole through the bill as shown below so the line passes smoothly through them. I've never used this method in practice, so I can't really comment on the pros/cons. It seems like it should work, but I would worry about the line getting damaged when it rubs against the eyes and bill. It also isn't as realistic looking as the internal method with the metal eyes and line outside of the head.

Option B -- Legit Method
Step 1 - Take Apart the Bait
Carefully pull the body from the head. I would also pull the bill out. It is attached with very weak glue. Super-gluing it back in at a later point will create a much more durable bait.

Step 2 - Remove the Wire
Pull the wire going through the bait out with a pair of vice grip pliers. The line tie and the hook eyelet are both part of the same wire. I haven't found any way to get it out other than the brute force method. Pull and twist out the hook eyelet first. If you try pulling the line tie eyelet out first it will break off at the nose and you'll never get the rest of it to come out.
It takes an enormous of force to get the wire out, but it will come out clean.
Step 3 - Drill Holes for Line Tube
Follow the diagram below for drilling holes with a 5/32 inch bit. Be aware you will need to drill through quite a bit of lead on the bottom hole.


Step 4 - Thread the Tube Through the Head
Tie a piece of heavy fishing line to one end of a piece of the mini aquarium tubing. Use the line to pull the tubing through the holes. It's easier to navigate the bend if you go from the bottom towards the nose.

Step 5 - Set Up Body Reenforcement Tubes
Drill three holes into the soft plastic body at the same location of the three holes in the head. I drill holes about an inch and a half into the body. Next cut three approximately three inch pieces of tubing, push them into the body halfway, and super glue them securely into place.


Step 6 - Trim the Tubes and Add Nail Weights
Measure the depth of the three holes in the head and trim the ends of the tubes sticking out of the body so they fit snugly in the head. The bottom tube will have to be trimmed extra short since it will run into the line tube a short ways into the head.
Next add three nail weights to the body. One inside the bottom tube, and the other two on either side and slightly below the bottom tube as shown in the photo below.

Step 7 - Glue the Whole Mess Together
Try fitting the two pieces together to make sure everything fits snugly. If everything looks ok you can start gluing it together. Glue the line tube in place first, then glue the body to the head. Coat all surfaces, holes, and tubes with the glue. Once it's together use pieces of masking tape to make sure the body is pressed firmly against to the head while it dries. Let it dry for several hours before moving on.

Step 8 - Finishing Up
Trim the ends of the tubes about 1/16 inch away from the head. Take a razor blade or exacto knife and clean up and uneven edges around the head/body junction.

Step 9 - Rigging
I rig the bait with two 2/0 Gamakatsu round bend treble hooks. This is a very realistic bait to begin with, so I feel it's ruined with a lot of extra wire, split rings, or even braided line. I prefer to attach the two treble hooks about two inches apart using 40 lb mono. Thread your main line through the tube then tie directly to the front treble hook. To give the bait an even more realistic appearance, and to make the action more consistent, embed both treble hooks into the bait as shown below. If the bait runs to the side a little, add more nail weights to the belly to balance it out.

 Fishing the Castaic Trout
The castaic trout really is the prototypical big bait = big fish lure. It is also a very heavy bait that requires specialized gear to fish comfortably. A heavier swimbait rod like an Okuma GSC76H or a G. Loomis BBR 965C would work well. I fish this size bait on 25 lb Big Game line.
Throw this lure from late fall through early spring, when big bass come up shallow to feed. The bait is surprisingly easy to fish. Just cast it out and retrieve it slowly below the surface. Keep the bait handy while your fishing and make a few casts whenever you hit a primary piece of structure on the lake. Big bass like big, obvious areas... main lake points, dams, or cover (weeds or wood) protruding into deep water.
Next month: Improving the Snap-On model!


 Advertising